How to use our reserved seating program
A quick guide to selecting seats when purchasing or reserving online
Not all JHS events will have reserved seating, but if it does here is a quick guide to selecting your ticket/seat.
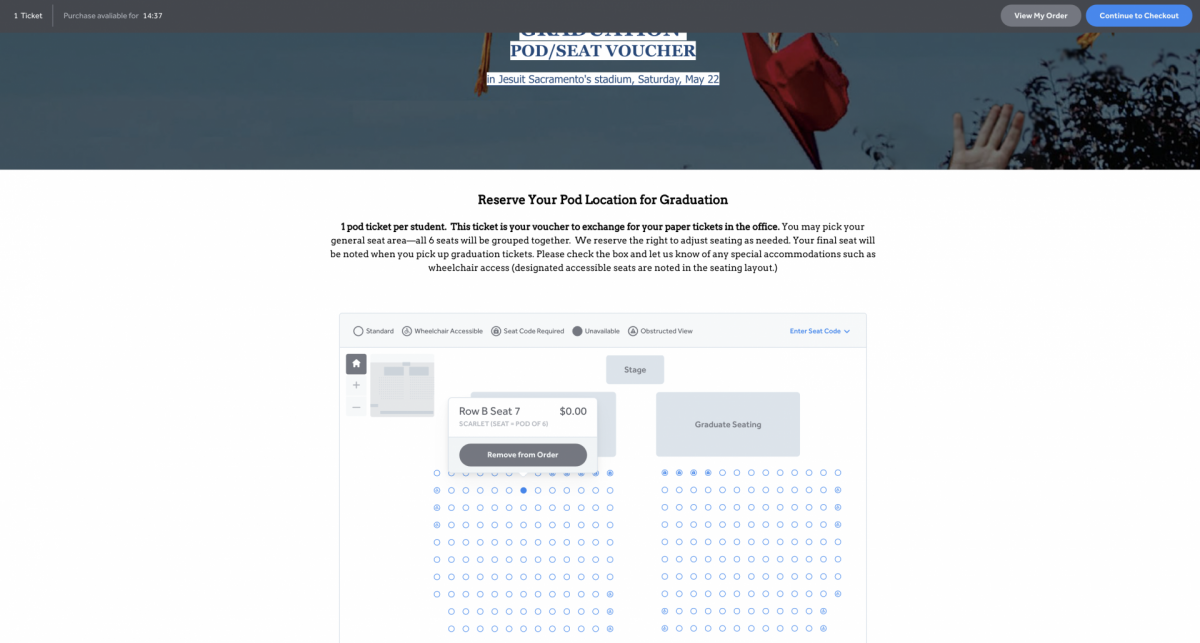
Reserved Seating Chart on ticketing site
If you open your ticket site and it has a window showing a seat chart, you may be able to select your own seats, table, or pod. Sometimes the system will be set up to choose the best available for you, but often you can select your seat.

Using the controls in the selection area
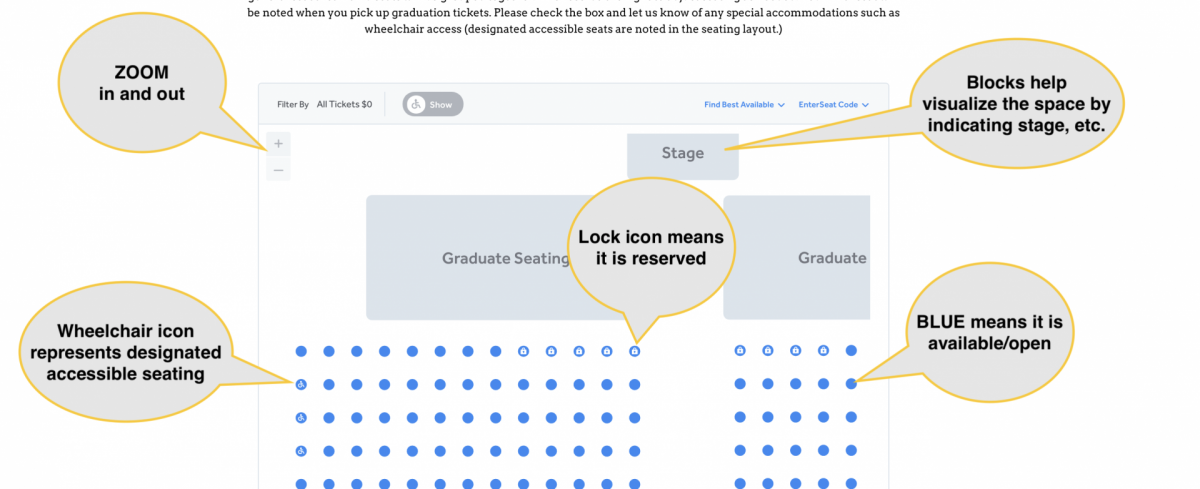
- You may need to Zoom in and out with the plus and minus signs in the upper left
- Solid blue or white means the seat is available, solid light gray means it is unavailable (already reserved)
- Select the seat and a popup will show with your seat details. This shows costt, if any, location and has a “Remove” button if you wish to cancel that selection.
View your order
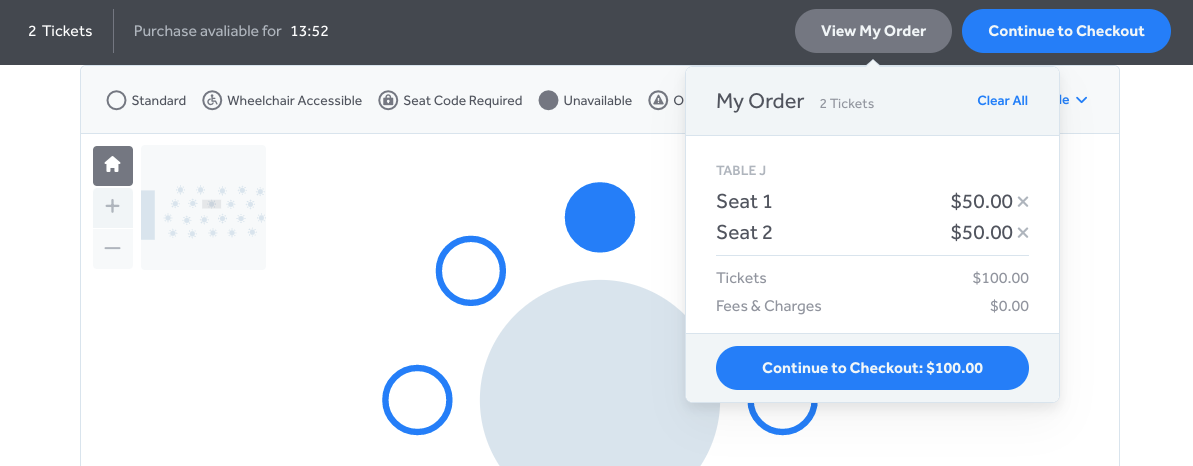
- View your tickets—make sure you haven’t accidentally selected more than you expected
- Use the “X” next to each ticket to remove
Add your ticket to the cart and continue
- Use the bar at the top click the ‘Continue to Checkout’ button once you have made your seat selection
- Watch your time remaining—if you run out of time your seat will be automatically released to the public
- View your number of tickets—make sure you haven’t accidentally selected more than you expected
Review and complete your reservation
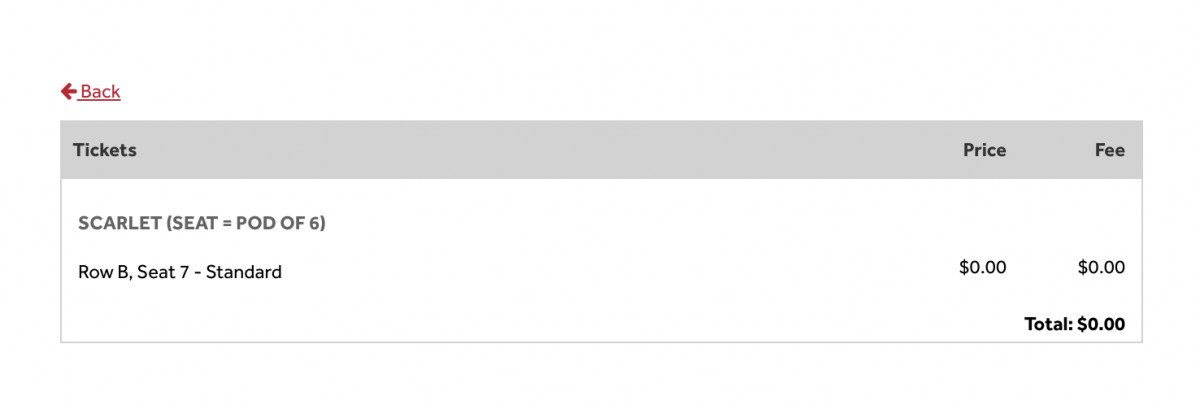
- Confirm your choice is correct and complete the rest of the details required such as name, email and billing information.
- Hit the button at the bottom (usually a ‘Submit’ button) to complete your reservation order
- If successful, you should get a confirmation screen and emails with your reservation details